Metal prints have gained immense popularity in recent years due to their unique appeal and ability to add a touch of elegance to any space. If you've invested in a stunning metal print and are wondering how to hang it like a pro, you've come to the right place. This comprehensive guide will take you through each step of the process, ensuring that your metal print is displayed flawlessly on your wall.
Understanding the Appeal of Metal Prints
Metal prints offer a modern and sleek alternative to traditional canvas or framed prints. The vibrant colors and glossy finish of metal prints make them an eye-catching focal point in any room. Additionally, metal prints are durable, fade-resistant, and easy to clean, making them perfect for long-term display. With their unique charm and lasting beauty, it's no wonder that metal prints are becoming increasingly popular among art enthusiasts and interior designers alike.
When it comes to choosing artwork or photographs to display in your home or office, the options can seem endless. However, metal prints have emerged as a standout choice due to their ability to transform ordinary images into stunning masterpieces. The glossy finish of metal prints adds a touch of sophistication and elegance to any space, instantly elevating the overall aesthetic. Whether you're looking to create a focal point in your living room or add a touch of personality to your office, metal prints are a versatile and captivating option.
The Rising Popularity of Metal Prints
Over the years, metal prints have seen a surge in popularity. Their ability to transform ordinary photographs into stunning masterpieces has captivated the hearts of art enthusiasts. The glossy finish of metal prints adds a touch of sophistication to any space, making them a preferred choice for interior decorators.
Metal prints' high-quality craftsmanship and longevity have also contributed to their rising popularity, making them an investment worth considering. As technology continues to advance, the quality of metal prints has improved significantly. Printing involves infusing dyes directly into specially coated aluminum sheets, resulting in vibrant colors and exceptional clarity. This innovative technique ensures that the image on the metal print remains sharp and vivid, even after years of display.
The durability of metal prints also sets them apart from other printing options. Unlike traditional canvas prints that can fade over time, metal prints are fade-resistant, allowing you to enjoy their beauty for years to come.
Why Choose Metal Prints for Your Space
There are several reasons why metal prints should be your top choice for displaying artwork or photographs. Firstly, the glossy finish of metal prints brings out the vibrancy and details of the image, creating a visually captivating piece of art. The reflective surface of the metal adds depth and dimension to the print, making it appear almost three-dimensional. This unique characteristic of metal prints adds an element of intrigue and creates an immersive viewing experience.
In addition to their visual appeal, metal prints are also incredibly practical. They are lightweight and easy to hang, making the installation process hassle-free. Unlike heavy framed prints or canvases that require sturdy hooks and nails, metal prints can be easily mounted using adhesive strips or hooks. This convenience allows you to effortlessly rearrange and update your space without the need for extensive wall repairs or adjustments.
Furthermore, metal prints are exceptionally durable. The aluminum material used in their construction is resistant to scratches, moisture, and UV rays, ensuring that your artwork remains in pristine condition even in challenging environments. Whether you choose to display your metal print in a well-lit room or a humid bathroom, you can trust that it will withstand the test of time without losing its vibrant colors or sharp details.
Lastly, metal prints offer a low-maintenance solution for displaying artwork. Unlike canvas prints that can collect dust or require professional cleaning, metal prints are easy to clean with a soft cloth and mild detergent. This convenience allows you to effortlessly maintain the beauty of your metal print, ensuring that it continues to impress and captivate viewers for years to come.

Preparing for the Installation of Metal Prints
Before you begin the installation process, gathering the necessary tools to ensure a smooth experience is crucial. You will need a tape measure, a level, a drill, wall anchors, screws, and a pencil. Having the right tools at your disposal can make all the difference when it comes to hanging metal prints.
A tape measure will help you determine the ideal placement for your print and ensure it is centered. Using a level will guarantee that your metal print is perfectly straight on the wall. A drill will be necessary to install wall anchors, ensuring your print is securely mounted. And don't forget a pencil to mark your measurements and anchor locations for accuracy. Following is more information about the importance of each tool.
The tape measure is not just any ordinary measuring tool; it allows you to precisely calculate the dimensions of your metal print and determine its perfect position on the wall. With the help of a level, you can ensure that your print is not tilted or crooked, creating a visually pleasing display.
The drill is a powerful tool that will make the installation process much easier, as it can penetrate various wall materials effortlessly. Wall anchors are crucial for providing extra support and stability to your metal print, preventing it from falling or sagging over time. Finally, the seemingly insignificant pencil plays a vital role in marking the exact spots where you will be drilling and inserting the wall anchors.
Assessing Your Wall Type
Before proceeding any further, it's crucial to understand the type of wall you have. There are generally three types of walls: drywall, plaster, and brick/stone. Each wall type requires a different approach for secure installation.
Let's start with drywall and plaster walls. These are commonly found in modern homes and are relatively easy to work with. However, they are not as sturdy as brick or stone walls. When hanging a metal print on drywall or plaster, wall anchors are essential to support the weight of the artwork. These anchors distribute the weight evenly across the wall, preventing any potential damage or accidents.
On the other hand, brick or stone walls offer a unique challenge due to their durability and strength. While they may seem intimidating to work with, there are specific screws or anchors designed for masonry that can securely hold your metal print in place. These specialized anchors ensure that your artwork remains firmly attached to the wall, even in the face of strong winds or vibrations.
By identifying your wall type, you can ensure that your metal print is safely and securely hung. Taking the time to assess your wall will save you from potential mishaps or damage to both your artwork and the wall itself.
Step-by-Step Guide to Hanging Metal Prints
With all the necessary preparations complete, here is a step-by-step guide to help you hang your metal print like a professional.
Step 1: Choosing the Perfect Spot
Take your time to select the ideal location for your metal print. Consider factors such as lighting, wall space, and overall aesthetics. Are you looking to create a focal point in your living room or add a touch of elegance to your bedroom? The perfect spot will enhance the ambiance of the room and complement your existing decor. Once you've chosen the spot, use your tape measure to determine the exact height and width you'd like your print to be placed. This will help you visualize how it will fit into the space and ensure it is positioned just right.
Step 2: Marking the Wall
Using a pencil, mark the top corners of where your metal print will be hung. Take a step back and assess the placement of the marks. Do they align with your vision for the space? Next, measure the distance between the two marks to ensure the print will be centered. This step is crucial to achieve a balanced and visually appealing display. Use the level to draw a straight line connecting the two marks, guaranteeing your metal print is perfectly aligned. This line will serve as your guide throughout the hanging process.
Step 3: Installing the Wall Anchor
If you have drywall or plaster walls, it's crucial to install wall anchors to support the weight of the metal print. The last thing you want is for your beautiful artwork to come crashing down! Choose wall anchors that are suitable for the weight of your metal print. Drill a hole at each mark on the wall using a drill bit appropriate for your chosen wall anchor. Insert the wall anchors into the holes and tap them flush against the wall surface. This will provide a secure base for the screws that will hold the metal print. Take a moment to appreciate the stability and peace of mind that the wall anchors provide.
Step 4: Hanging the Metal Print
Now comes the exciting part – hanging your metal print! Place your metal print over the wall anchors, aligning it with the level line you drew earlier. Take a step back and admire how the print enhances the space. Gently insert the screws through the holes in the metal print and into the wall anchors. As you tighten the screws, feel the satisfaction of seeing your artwork securely held in place. Be careful not to overtighten and damage the print or wall. This step requires a delicate touch to ensure the longevity and beauty of your metal print.
Step 5: Ensuring Proper Alignment
Once your metal print is hung, step back and assess its alignment. Does it exude the desired impact and visual appeal? Use the level to double-check that it is straight. The level will be your trusted companion in achieving a perfectly aligned display. If adjustments are needed, gently loosen the screws and reposition the print accordingly. Take your time to ensure it perfectly aligns with your initial markings and level line. This attention to detail will elevate the overall aesthetic of your space and showcase your metal print in all its glory.
Common Mistakes to Avoid When Hanging Metal Prints
While hanging metal prints can be a straightforward process, there are some common mistakes that you should avoid to achieve a professional-looking display.
Ignoring Wall Type
Ignoring the type of wall you are hanging your metal print on can lead to inadequate support and potential damage. Always identify your wall type and use the appropriate hanging methods for optimal security and stability.
Incorrect Measurements
Accurate measurements are essential to ensure that your metal print is centered and properly aligned. Take the time to measure and mark your measurements carefully, double-checking before drilling any holes or inserting screws.
Rushing the Process
Hanging a metal print requires precision and attention to detail. Rushing through the installation can result in uneven placement or crooked prints. Take your time, follow the steps meticulously, and you'll be rewarded with a perfectly hung metal print.
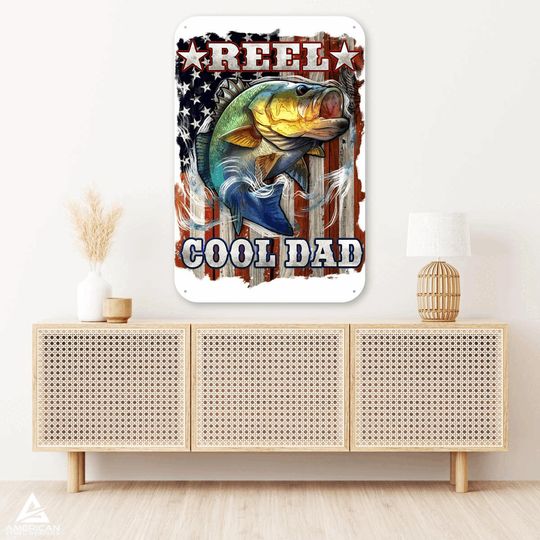
By following these five easy steps, you'll be able to hang your metal prints, such as the Jumping Bass Steel Print by American Steel Designs, like a pro. The unique appeal of metal prints, durability, and ease of installation make them an excellent choice for showcasing your favorite artwork or photographs. So grab your tools, pick the perfect spot, and let your metal prints take center stage in your home or office.